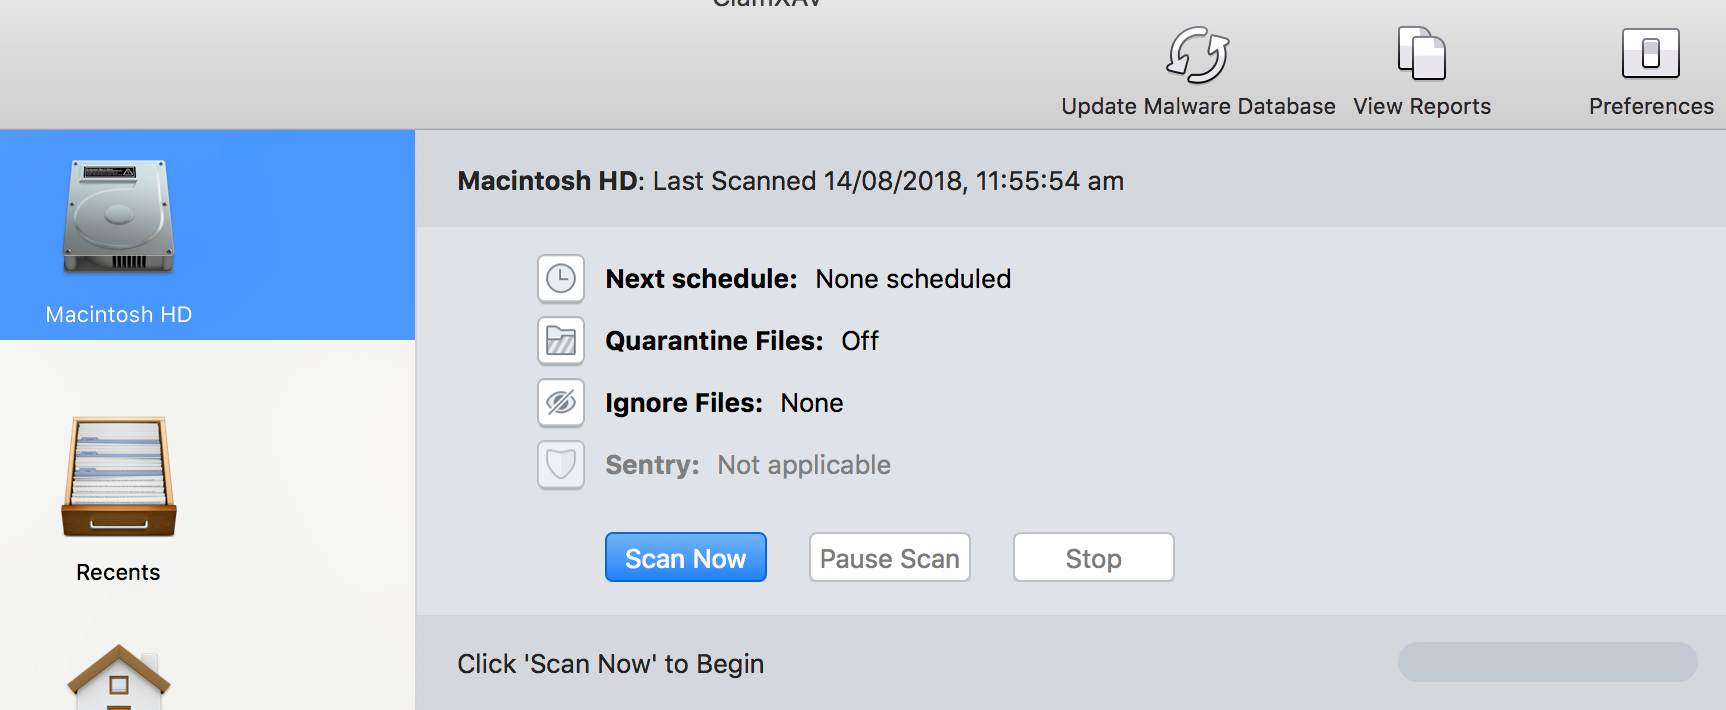
Settings Area
The settings area of ClamXAV’s main window is where you can really tweak its settings to customise ClamXAV.

The area is split into three main sections:
- The top part confirms the name of the currently selected item in the Source List along with the date of its most recent scan.
- The middle section contains all the settings corresponding to the selected item.
- The bottom section provides useful contextual information such as displaying the name of each file as it gets scanned, a progress bar, and the result of the scan afterwards.
The Buttons
Each icon is a button, and each button exposes a number of settings specific to the currently selected item in the Source List.
Schedule Settings

You can set ClamXAV to scan this item automatically, at a time when you know your Mac is going to be up and running and connected to the internet.
To turn off a scheduled scan, just change the day popup to Off.
Remember, the main ClamXAV application doesn’t need to be running for scheduled scans to take place, but your computer does need to be on and awake.
Quarantine Settings

By default, ClamXAV will automatically quarantine any infected item it encounters. If you like, you can change that option here.
Ignore Files

This allows you to prevent ClamXAV from scanning certain filetypes (PDFs, images, etc). Please note that the files will still be inspected briefly to determine that they match the filetype to be ignored, but the contents won’t be scanned for malware.
- The Advanced Ignore Settings button will open a white box, where you can drag and drop the items you don’t want scanned. Items can be enabled or disabled on an individual basis using the Enabled checkbox.
- If you know how to use Regular Expressions, you can use that to specify which files should be excluded from a scan. To treat a pattern as a Regular Expression, just tick the checkbox under RegEx
- The last column, Comments, is just a handy reminder! Simply enter a description to help you remember why you’re excluding a file or folder, or what the Regular Expression pattern means or does.
- Sentry will honour the Advanced exclude settings from this popover panel.
Sentry

You can prevent Sentry from scanning any new or modified files on this disk be enabling the option to Exclude this item from background monitoring.
Alternatively, disks can be excluded from being scanned automatically when they’re connected by ticking the Don’t scan… checkbox.
If you’ve disabled Sentry via ClamXAV’s Advanced preferences, you won’t be able to open this setting’s popup panel.

